The best burger bun

The best burger bun

The argument over the best burger bun could go on forever, we see brioche everywhere these days though I find many far too sweet and better suited to a bread and butter pudding than a burger bun, we have the sesame seed buns, the bog-standard store-bought white buns that turn to mush and fall apart as soon as a burger touches them. A few years back when I did a charity BBQ I was lucky to have all the bread donated by world champion baker Alex Gooch, among the bread types were potato rolls for the burgers that I would be doing at the BBQ, they were also used for the pulled pork and beef.

These are my take on those rolls, I experimented and made a few different variations but these proved to be the best burger buns.

Ingredients
  • 500g strong white bread flour
  • 200g mashed potato
  • 10g yeast
  • 10g sea salt
  • 20g sugar
  • 2 eggs (one for glaze)
  • 100g butter
  • 150ml of warm milk
Instructions

Make the mashed potato, use a potato ricer to get the smoothest possible mashed potato.

In a large mixing bowl add the flour, 175g of your mashed potato, the yeast and warm water, milk, one egg and your salt. Start mixing together and add the softened butter.

If you have a stand mixer knead using the dough hook on slow speed for around 8 minutes, of course, you can knead by hand a perfect arm workout and releases any frustration you have.

Once kneaded set aside in a covered bowl for roughly one hour or doubled in size.

After proving knock back your dough and divide into 8 even-sized rolls, if you have OCD or are just anal about them being the same size weigh them out to get them all the same size. Roll and place on a parchment-lined baking tray cover and do a second proving of around 45 minutes.

Preheat your oven to 200c, 400f or gas mark 6. In the base of your oven add an ovenproof bowl or tray and add cold water or ice cubes, this forms the steam that commercial ovens have to create the perfect crust on your bread. Place the buns in the centre of the preheated oven. After fifteen minutes using the egg, you kept for glaze and a tablespoon of milk, beat the egg and add the milk to create an egg wash, remove the buns from the oven and brush over the egg wash mix, return to the oven for a further 12-15 minutes until the buns are golden brown on top.
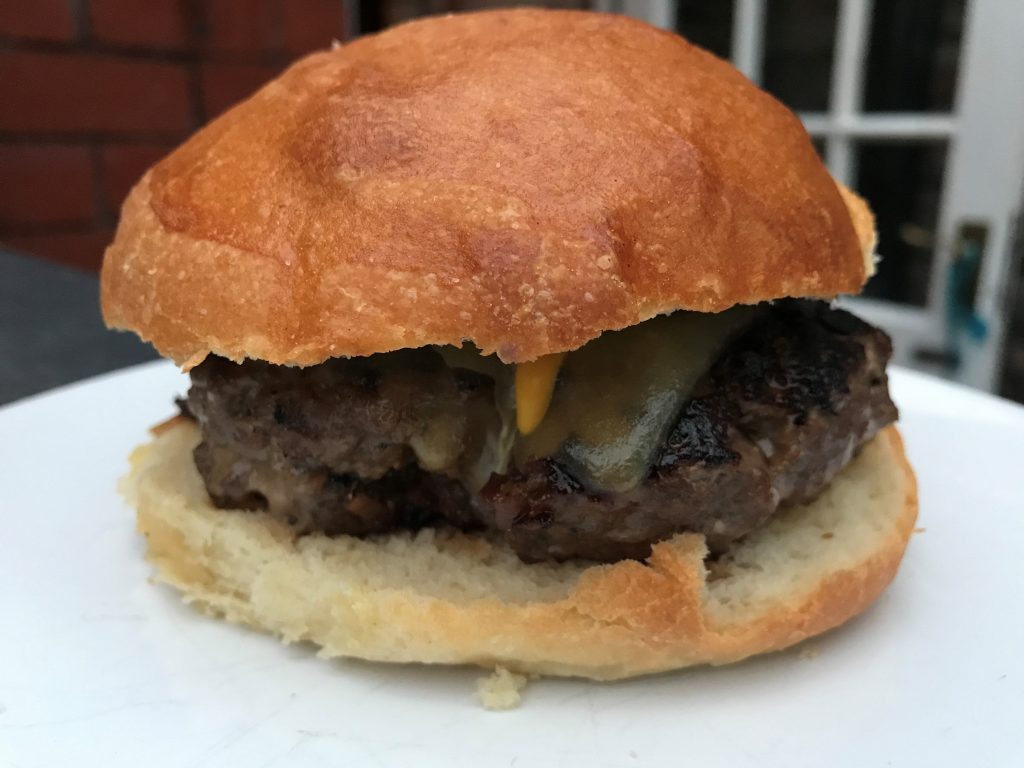
the best burger bun

The best burger bun to go with the perfect burgers recipe posted earlier. Enjoy and don’t forget to leave a comment and share.

Perfect Burgers

Perfect Burgers

With the amazing weather and time on our hands why not make your own perfect burgers. Everybody loves a good burger and with an early BBQ season on us and all being at home, there is not a better time to make your own perfect burgers. All the fast-food chains are shut so create your own burgers at home, get the kids to help with making them. These are my perfect burgers, you can mix it up, add blue cheese, chilli, different herbs and spices. Try lamb or pork, lamb, mint and feta are a great alternative to the beef burger, pork apple and sage. Like I say your burger your choice, let the imagination run wild, and remember cooking should be fun if the kids want to add tomato sauce into the mix crack on.

Recipe type: Main

Prep time: 15 mins

Cook time: 10 mins

Total time: 25 mins

Serves: 6

My Perfect Burgers

Ingredients
  • 500g Minced Beef
  • 100g Cheese (I prefer Cheddar feel free to experiment)
  • 2 cloves crushed Garlic
  • 1 small red onion or shallot finely diced
  • 2tsp English Mustard
  • 1.5 tbsp Worcestershire sauce
  • Salt and freshly ground black pepper
  • Herbs of choice, my preference is Thyme and Parsley, like with the cheese feel free to experiment with your favorites

Instructions

  1. In a large bowl mix the herbs, mustard, Worcester sauce, garlic and onion together.
  2. Add the meat and your choice of cheese season well and combine until all mixed well together.
  3. Form into six burgers and place in the fridge to chill, this helps them retain their shape when cooking.
  4. If cooking on the BBQ lightly oil the grill and over a medium heat cook for 4-5 minutes on each side keeping them pink and moist in the centre.
perfect burgers

If I do serve on a roll it is my potato bread rolls, I will be adding the recipe for them in another post.

I often do what I call naked burgers without bread, using things like sliced and griddled aubergine or a portobello mushroom as the base and top.

naked burger
Naked Burger

How you dress your burger is your choice and limited only by your imagination, be it bacon, pulled pork, pickles and cheeses, your burgers your choice.

Chocolate Cake

Chocolate Cake

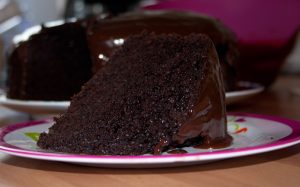
This is one of the most requested recipes I have done, by far the easiest chocolate cake I have ever made. I first made this getting on for 10 years ago with Ffion. We have made it a number of times over the years and still can not get over how simple it is to make, how moist it is and how good it tastes. Try it for yourself and see how good this cake is. What else have you got to do with your time, this is a great recipe to get the children involved with.

Recipe type: Dessert

Serves: 12 

Ingredients
  • 1.1lb self-raising flour.
  • 1lb caster sugar.
  • 1½ tsp vanilla extract.
  • 4oz cocoa powder.
  • 2 tsp bicarbonate of soda, sifted.
  • 7oz unsalted butter, softened.
  • 250 ml milk, or unsweetened yoghurt.
  • 3 large free range eggs.
  • 250 ml hot coffee.
  • Decoration.
  • 1lb high quality chocolate preferably dark with at least 70% cocoa content, chopped.
  • 500ml double cream
Instructions
  1. Preheat oven to 170c, 150c fan assisted or gas mark 3.
  2. Grease and line the base with the greaseproof paper of a 12″ cake tin or two 6-7″ tins.
  3. Weigh out all the ingredients and place into a large mixing bowl or food mixer.
  4. Mix until all the ingredients are fully combined including the butter.
  5. Pour into prepared tins and bake in preheated oven for about one hour until a skewer leaves the centre of the cake cleanly.
  6. For the decoration of the cake, place the cream in a saucepan and heat until bubbling at the edges but not boiling. Remove from the heat and add the chocolate, stand for 2-3 minutes then mix well. Whisk until smooth and silky then place in the fridge to chill.
  7. When both the cake and the chocolate and cream mix has cool, dress the cake with the cream mix and serve.
chocolate cake
Chocolate cake

Huevos Rancheros

Huevos Rancheros

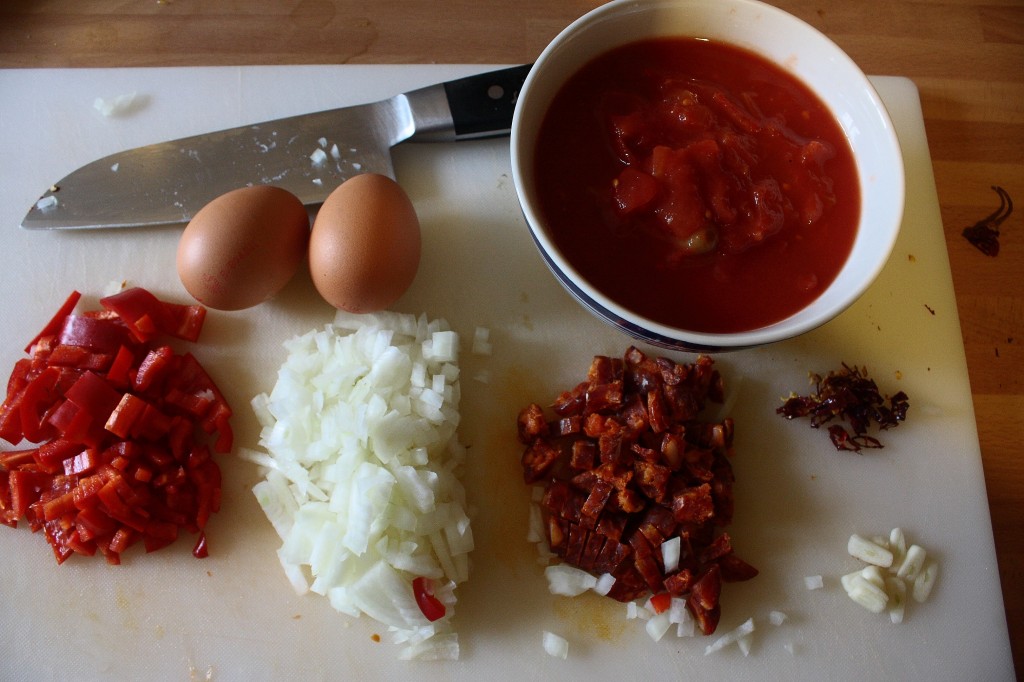
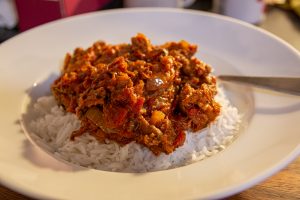
A rich spicy Mexican breakfast dish, huevos rancheros. Mix up your breakfast or brunch with this simple but flavourful recipe.

Spicy egg breakfast dish.

Ingredients
  • 2 tbsp Oil, I use rapeseed oil.
  • 4 eggs (free-range)
  • 1 onion finely diced.
  • 1 red chilli finely chopped.
  • 2 cloves of garlic finely chopped.
  • 100g chorizo finely chopped
  • 1 tsp dried oregano
  • 1tin chopped tomatoes
  • 1 large red pepper
huevos rancheros
Instructions
  1. Heat the oil in a large frying pan, add the onions, chorizo, chilli, garlic and oregano.
  2. Fry gently until the onions soften and the rich oil of the chorizo is released.
  3. Add the tomatoes and peppers and cook until the sauce has thickened and the peppers softened.
  4. In the sauce make some little wells and break the eggs into them. Cover the pan and cook until the egg whites are firm.
  5. The dish is ready and can be eaten as is or served on tortillas garnished with chopped corriander.
Notes

Roasted peppers bought in jars can be used or char your peppers for a roast pepper taste, to spice further add half a teaspoon of hot smoked paprika.

The basic dish consists of fried eggs served on lightly fried charred corn or flour tortillas topped with a Salsa Fresca, Pico de gallo, also called Salsa Fresca or salsa cruda, is a type of salsa commonly used in Mexican cuisine. It is traditionally made from chopped tomato, onion, Serrano peppers, with salt, cumin, lime juice, and coriander. Common accompaniments include refried beans, Mexican-style rice, and guacamole or slices of avocado, with coriander as a garnish

Variations using wheat flour tortillas instead of corn, and pureed chilli or enchilada sauce instead of tomato-chilli salsa Fresca, have appeared. Non-Mexican additions such as cheese, sour cream, and lettuce also have become common additions beyond the dish’s native range.

Thai Red Curry

Thai Red Curry

All my life I have been a lover of curry mainly I admit Indian and the odd Chinese.  I have made my own curries from scratch for many years but have never made Thai red curry. Come that Thai food in general.  Growing up there was an abundance of Indian and Chinese restaurants where I lived but no Thai. Maybe this was the reason I never ventured into the world of lemongrass, galangal, fish pastes and sauces.  So after 30 years of cooking, I thought it was time I had a go.  The start of the journey was the purchase of  David Thompson Thai Food, this book adds to my main vice in life cookbooks, it is a fantastic addition to my growing collection.

Armed with the ultimate shopping list I ventured out to collect the makings of a Thai Red curry.  Two hours later and a lighter wallet all except a kaffir lime was purchased.  Back to the kitchen and the preparation work started.

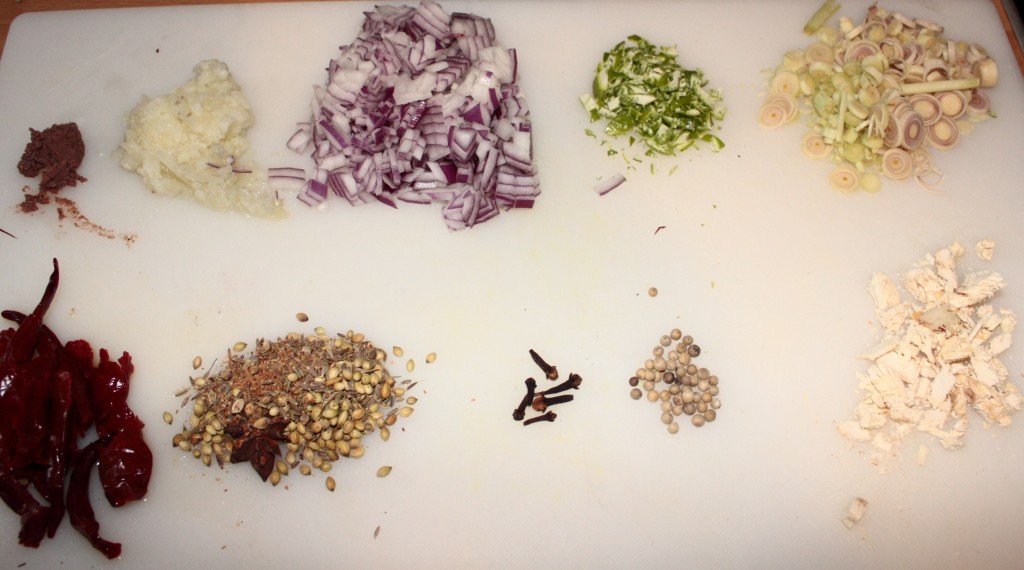
First task was to slice and dice the various ingredients for the red paste.

Ingredients
  • 2 tbsp lemongrass finely sliced
  • 1 tbsp galangal cut finely
  • 1 tbsp lime rind cut finely
  • 2 tbsp red shallot diced
  • 1 tbsp roasted red shallot
  • 2 tbsp garlic purée
  • 1 tsp shrimp paste
  • 10 white peppercorns
  • ¼ grated nutmeg
  • 5 cloves
  • 5 long dry red chillies
  • 1.5 tsp coriander seeds
  • 1 tsp cumin seeds
  • 1 star anise
thai red curry

Starting in the pestle and mortar with the driest and hardest begin to make your paste, I started with a good pinch of sea salt, galangal, and the seeds which had been lightly roasted to release their oils, pound until the ingredients are well combined then add the finely sliced lemongrass and repeat the process, continue adding the ingredients from driest to wettest.  The long red chillies had been soaked in a little boiling water for 20 minutes before starting, keep the liquid as it can be added if the paste is a little dry.

This is a time and labour intensive method of making the paste but the result is far better than just chucking it all in a processor or blender.  With the number of ingredients in the recipe it took me around 40-45 minutes to produce a smooth paste with no lumps or strands of dry ingredients still in the paste.

This paste is more than enough for the curry I intend to make so a large part will be frozen in table-spoon portions ready for the next foray into Thai food be it soups or curries.

Leftover Lamb Hotpot

Leftover Lamb Hotpot

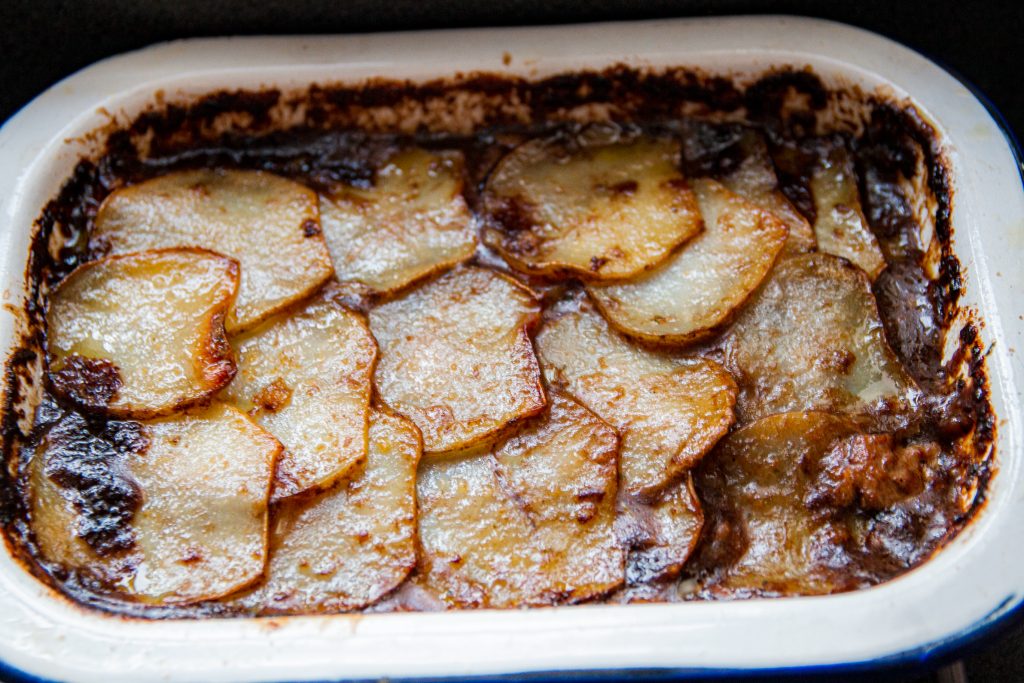
More leftovers, this time leftover lamb hotpot. I have never been one to waste food and at the moment in dire times, we find ourselves it is good to use the leftovers up. In future posts, I will be doing more with leftovers and trying to ring the changes from the norm. I served this with butter cabbage with bacon and peas. I tend to make enough for a few portions and freeze what’s left after I have eaten.

Ingredients

  • 400g Potatoes
  • 400g lamb (cooked and cut into chunks)
  • 1 onion, chopped
  • 2 carrots, sliced
  • 1 leek, sliced
  • 1 sprig of rosemary
  • 1 tbsp Worchestershire sauce
  • 1 tbsp plain flour
  • 400ml lamb stock
  • 2 tbsp olive oil

Method

  1. Preheat the oven to 200oC (fan 180oC).
  2. Place a large pan with one tbsp olive oil on the hob. Once the oil has heated up add the onion, carrot and leek to the pan and fry gently until they start to get a bit of colour.
  3. Add the lamb and keep cooking for a couple more minutes then stir in the flour to absorb the juices.
  4. Add the Worcestershire sauce to the pan to deglaze and then add the stock. Simmer for 10 minutes, stirring occasionally, then season.
  5. Tip the lamb mix into an ovenproof dish. Slice the potatoes and layer them on top. Brush the top with the remaining olive oil and season.
  6. Cook in the oven for around 30 minutes until the potatoes are golden.
Leftover Lamb Hotpot

Leftover Lamb Madras

Leftover Lamb Madras

I could possibly live on curry in one form or another, one of my favourites is my leftover lamb madras. You can, of course, use any meat you have from chicken to pork and even fish. So many curries we have bare no resemblance to authentic Indian cooking at all, where possible I like to cook as close to authentic recipes as I can.

Ingredients

1 tbspcoriander seeds
1 tspblack peppercorns
1 tspfennel seeds
10fenugreek seeds
4cloves
4dried hot red chillies
6 tbspolive or groundnut oil
2onions, very finely chopped
1 tspvery finely grated fresh ginger
2 tspcrushed garlic
3–4fresh hot green chillies, very finely chopped
900g (2lb)Meat of choice, diced shoulder of lamb here.
2large tomatoes, very finely chopped
1½ tspsalt
400ml (14fl oz)tin coconut milk, well stirred
1 tbspfinely chopped coriander, to garnish

Instructions

Put the coriander seeds, peppercorns, fennel seeds, fenugreek seeds, cloves and chillies into a small, cast-iron frying pan and set it over medium heat. Stir the spices over the heat until they are a shade darker and give off a roasted aroma. Transfer to a bowl and leave to cool, then grind in a clean spice grinder or coffee grinder.

Pour the oil into a wide, non-stick pan, and set it over medium–high heat.When the oil is hot, add the onions and cook, stirring, until they turn brown at the edges. Add the ginger, garlic and green chillies and stir-fry for 20 seconds. Add the meat and cook, stirring, for 5 minutes. Stir in the tomatoes, ground roasted spices, salt and coconut milk and bring to the boil.

Cover the pan, turn the heat to low and simmer gently for 1 hour or until the meat is tender. Uncover the pan and boil away a lot of the liquid, until a thick sauce clings to the meat. Garnish with finely chopped coriander to serve.

leftover lamb madras

Lamb Wraps

Lamb Wraps

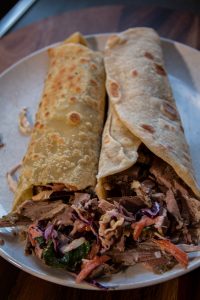
More use of the leftover Lamb from Sunday’s slow roast shoulder. Lamb wraps, to go with the lamb I mad a simple slaw and added fresh mint and candied jalapenos. For the wraps I used the recipe below, I always have bread flour here so going to the shops for just a few wraps was hardly essential.

Ingredients

  • 500g strong white bread flour, plus extra for dusting
  • 10g salt
  • 30g caster sugar
  • 10g instant yeast
  • 30g unsalted butter softened
  • 320ml cool water
  • A little olive oil for cooking

Method

  • 1. Tip the flour into a large mixing bowl and add the salt and sugar to one side of the bowl and the yeast to the other. Add the butter and three-quarters of the water, and turn the mixture round with your fingers.
  • 2. Continue to add water a little at a time until you’ve picked up all the flour from the sides of the bowl. You may not need to add all the water, or you may need to add a little more – you want a dough that is soft, but not soggy. Use the mixture to clean the inside of the bowl, folding the edges into the middle. Keep going until the mixture forms a rough dough.
  • 3. TIP the dough onto a lightly floured surface and knead well for 5–10 minutes. Do not add too much flour to your work surface as this will make the dough too dry.
  • 4. When your dough feels smooth and silky, put it into a lightly oiled large bowl. Cover with a tea towel and leave to rise until at least doubled in size – at least 1 hour, but it’s fine to leave it for 2 or even 3 hours.
  • 5. Dust a work surface lightly with flour and tip your dough onto it. Fold it inwards repeatedly until all the air is knocked out and the dough is smooth. Divide into 60g pieces.
  • 6. You may find it easier to shape and cook your wraps in batches. Roll each piece into a ball. Using a rolling pin, roll out each ball to a circle, 20cm in diameter, rolling out from the middle up, then from the middle down, and turning the dough regularly to prevent it from sticking to the work surface.
  • 7. Heat a 23–25cm frying pan over high heat and add 1 tbsp vegetable oil. When it starts to smoke, place one of the dough rounds in the pan and fry for 2 minutes. Flip the bread over and cook the other side for 1 minute. Repeat to cook the rest of the dough rounds, adding a little more oil to the pan if you need to. When each one is cooked, place it on top of the last. Stacking the wraps like this traps steam between them and helps to soften them as they cool.
  • 8. Once cool, wrap the bread in cling film. Use within 24 hours, or freeze them interleaved with cling film or baking parchment to keep them separate, otherwise, they will freeze into a solid mass.
lamb wraps

Slow roast shoulder of lamb

Slow Roast Shoulder of Lamb

I think ever since I was a child slow roast shoulder of lamb has been one of my favourites. I am not one for spring or new season lamb I find it tasteless, spring to me is when we first see the lambs bounding about in the fields enjoying the spring sunshine. If I have lamb it will generally be from September onward. What I have cooked here is hogget or lamb that is over a year old, when it gets to two years it is then mutton.

So for this, all you need is a whole shoulder of lamb, hogget or mutton. A few sprigs of rosemary, 3 or 4 cloves of garlic, zest of a lemon, a few anchovy fillets, salt, pepper and a good glug of olive oil. Add all the ingredients to a pestle and mortar and give a good bash. Score the flesh of the meat and massage the marinade all over. You can place into a dish and cover or as I do wrap well in clingfilm and place in the fridge overnight.

Preheat your oven to 150c, gas mark two or 300f. In your roasting tray or like I did in a large casserole pot place onions, carrots, celery all roughly chopped, this is your trivet that the meat will sit on during cooking, to the tray or pot add a glass of white wine, a stockpot, cube or fresh stock about two cups. Place the meat and all the marinating bits and pieces onto the trivet of veg, cover with foil or place the lid on and put into your preheated oven.

Sunday Roast

This really is a joint you can just pop in the oven and get on with whatever else you want or need to.

Slow roast shoulder of hogget

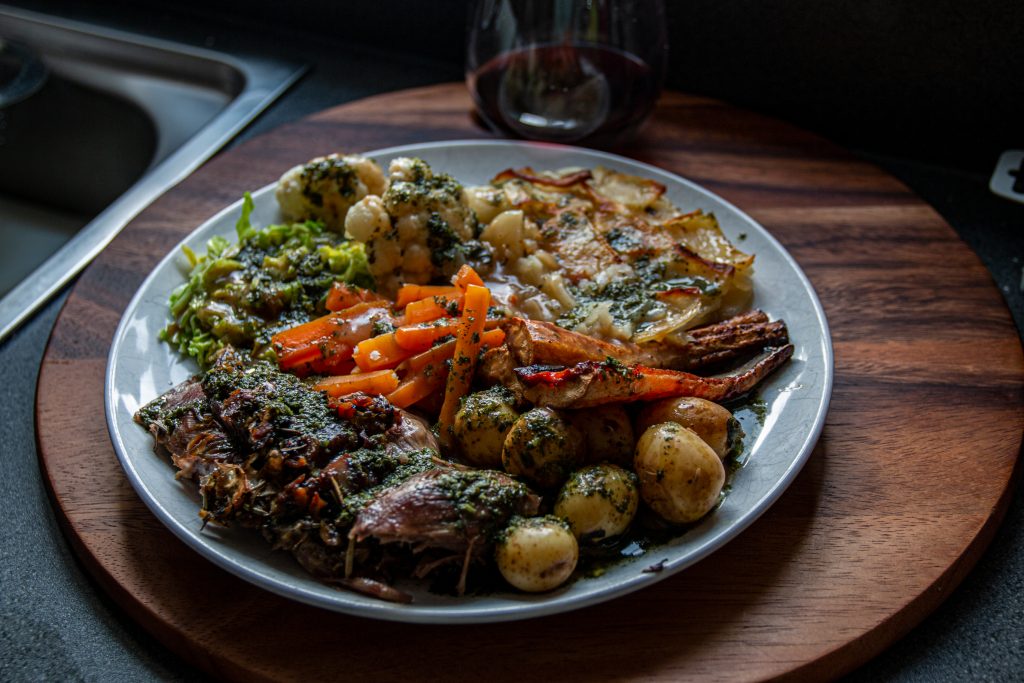
The picture above is the end result after 6 hours of slow cooking, the bones just pulled out and the meat was tender and juicy. The veg that was the trivet are now basically confit and taste amazing, of course the meat juices make the most amazing gravy,

slow roast hogget
Sunday roast

I served it with minted new potatoes, boulanger potatoes, honey roast parsnips. buttered savoy cabbage, cauliflower and carrots with a rich mint gravy and mint sauce. You can’t have lamb without mint sauce.

Moules Mariniere

Moules Mariniere

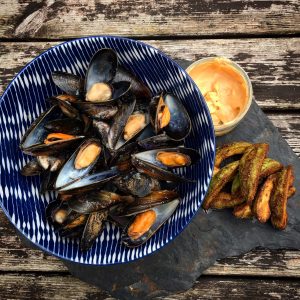
Mussels are at there best at this time of year. This is the classic French dish of Moules Mariniere. Though the best I have had were in Belgium where it is a firm favourite with one of their great beers.

Ingredients

1.75kg/4lb mussels

1 garlic clove, finely chopped

2 shallots, finely chopped

15g/½oz butter

a bouquet garni of parsley, thyme and bay leaves

100ml/3½fl oz dry white wine or cider

120ml/4fl oz double cream

a handful of parsley leaves, coarsely chopped

crusty bread, to serve.

moules mariniere

Method

Wash the mussels under plenty of cold, running water. Discard any open ones that won’t close when lightly squeezed.

Pull out the tough, fibrous beards protruding from between the tightly closed shells and then knock off any barnacles with a large knife. Give the mussels another quick rinse to remove any little pieces of shell.

Soften the garlic and shallots in the butter with the bouquet garni, in a large pan big enough to take all the mussels – it should only be half full.

Add the mussels and wine or cider, turn up the heat, then cover and steam them open in their own juices for 3-4 minutes. Give the pan a good shake every now and then.

Remove the bouquet garni, add the cream and chopped parsley and remove from the heat.

Spoon into four large warmed bowls and serve with lots of crusty bread.

Perfect chips

Mussels go great with chips and a good mayo or aioli, this is how i do my perfect chip.

Perfect Chips

My prefered potatoes for perfect chips is the Maris Piper this is the most widely grown potato variety in the UK and a firm favourite of the fish & chip shop.  For two people the following will be plenty.  If you have no issues with fat then the best fat by far to cook your chips in is beef dripping, this was the favourite of the chip shops for many years before we all became health-conscious, on the odd occasion using beef dripping will give you a treat worth the calories.

500g of Maris Piper potatoes

Beef dripping

Peel and cut the potatoes and wash thoroughly.

Boil a pan of salted water and place the chipped potatoes in a bring back to boil then gently simmer for ten minutes.

Strain and cool the chips on a wire rack, once cool place in the fridge to chill.

In a large heavy-bottomed pan or deep fat fryer heat the beef dripping to 130C, in a mesh basket fry the chips for 8-9 minutes until just coloured.  Remove and shake well to drain off the oil, cool on the wire rack once cool place in fridge to chill.

When you are ready to eat heat the oil to 190C  using the mesh basket fry the chips for 2-3 minutes times can vary depending on the cooker and chip size, once golden brown in colour remove and shake to drain excess oil, place on kitchen paper to absorb any further oil and serve immediately.

error: Content is protected !!